
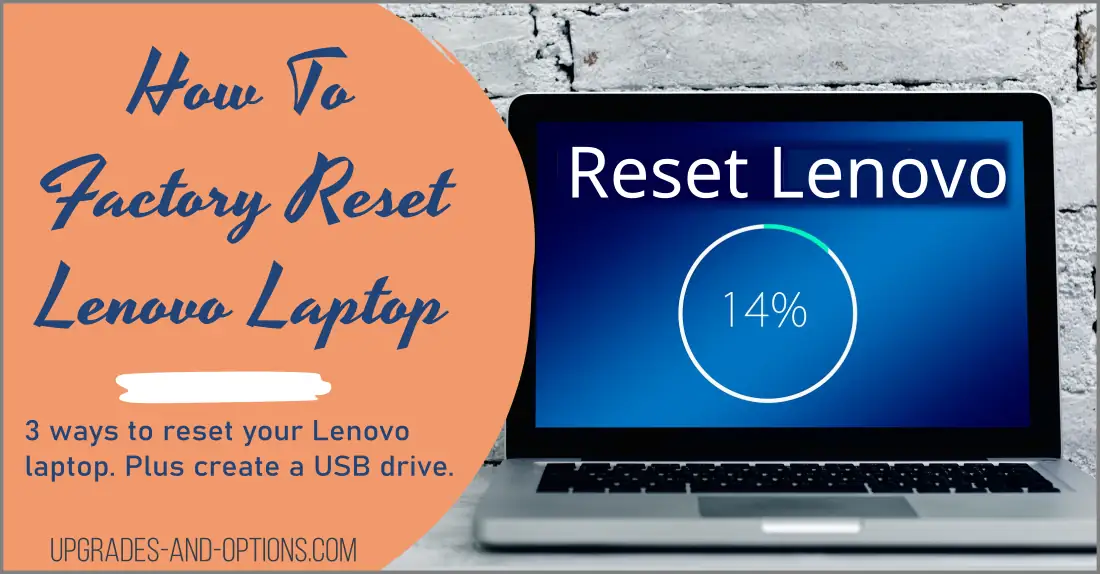
Step-by-Step Guide to Wipe a Lenovo Laptop | Restoring Lenovo Laptop to Factory Settings
Step-by-Step Guide to Wipe a Lenovo Laptop | Restoring Lenovo Laptop to Factory Settings
Contents
show
Reliable performance, durability, and innovative design are some of the notable characteristics associated with Lenovo laptops. However, like any other tech gadget, they can have their off-days due to system errors, virus attacks, or simply because of impeded performance over time. At such moments, restoring your Lenovo laptop to its factory settings can be a great solution. This technique gets your computer back up, running efficiently, and can solve numerous issues without necessitating any technical skills.
Nonetheless, carrying out a restoration process on your Lenovo laptop may seem daunting if you have never done it before. The anxiety and uncertainty associated with the potential of losing significant data can be overwhelming. This article aims at providing an easy-to-follow procedure that guides you through the process of resetting your Lenovo laptop in a manner that is not only safe for your data but also highly effective in ensuring optimal performance.
In the subsequent sections, we will deliver a detailed tutorial on how to securely and effectively wipe your Lenovo laptop and reset it back to its original settings. The guide takes on a step-by-step approach, making it convenient and easy for both tech-savvy and novice users. Do remember to back up all your essential files and data before initiation, as the process will erase everything stored on your computer. With this in mind, lets dive into the walkthrough.
An Extensive Step-by-Step Walkthrough to Clean Slate Your Lenovo Laptop and Reinstate Factory Settings
Laptops often hold a world of information and applications, which over time can lead to the system slowing down. Reverting your Lenovo laptop back to its factory settings can be the cure to all these maladies. Here, we’ll present a thorough guide that will completely wipe your Lenovo laptop and bring it back to its initial factory settings.
Backing Up Your Data
Always remember, carrying out this process will erase all the data on your device. So, the first thing you need to do is secure a backup for all your important files and documents. You can do this by transferring them onto an external hard disk or opt for a cloud storage solution, like Google Drive or Dropbox.
Resetting Your Lenovo Laptop to Its Original State
Now, to the steps for resetting your Lenovo laptop to its factory condition. It’s important to make sure your laptop is connected to a power source during this process. After this is assured:
- Begin by clicking on the Start button, located at the bottom left corner of your home screen.
- Go to the Settings menu, symbolized by a gear icon.
- In this menu, select Update and Security.
- Choose Recovery from the left pane and then click on Get Started under Reset this PC.
- Click on Remove Everything and then Just remove my files.
- Finally, click Reset and wait for the process to complete. Patience is necessary as this could take a while.
Following these steps will ensure your Lenovo laptop is wiped clean and primed to be returned to its factory settings. The entire process could take over an hour, so it is advisable to not disrupt the process once initiated.
Reasons to Consider Clearing All Data on your Lenovo Laptop
In some situations, you may need to restore your Lenovo laptop to its original manufacturer settings. Clearing all data, or wiping, can have various reasons, each necessitating the same actions because the result is to reinstate the laptop to its factory settings. It effectively resets the system settings and deletes all data stored on the laptop, giving you a fresh start.
Slowed Down Performance
One of the primary reasons why people choose to wipe their Lenovo laptop is sluggish performance. Over time, you may notice that your laptop isn’t running as smoothly or swiftly as it used to, causing frustration and lost productivity. When this happens, restoring the laptop to its original state could help improve its performance, getting it back up to speed.
Virus or Malware Infection
Another common reason for wiping a Lenovo laptop is when the device gets infected with a virus or malware. These malicious programs can cause significant harm to your computer system and compromise your private information. In such cases, thoroughly cleaning the laptop system might be the only option to ensure complete removal of these harmful elements and protect your security and privacy.
Selling or Recycling the Lenovo Laptop
If you are considering selling or recycling your Lenovo laptop, clearing all personal data is a crucial step. Wiping the computer effectively removes personal information, thereby preventing unauthorized access to sensitive data by the new owner. In this case, restoring the system to its factory settings ensures you leave no personal trace behind and protects you from potential data misuse or identity theft.
System Upgrade or Reinstallation

Lastly, some users might wipe their Lenovo laptop to upgrade or reinstall the system. A clean install ensures maximum compatibility and performance with the latest operating system, eliminating potential issues caused by previous software versions or residual data and settings.
Important Points to Ponder Over Before Initiating the Process to Wipe Your Lenovo Laptop
Before you embark on the task of restoring your Lenovo laptop to its default factory settings, there are significant points that you should consider. These points are crucial to avoid irreparable loss of crucial data and to ensure a successful reset process.
Data Backup
Remember, initiating a reset process on your Lenovo laptop will completely wipe off all the data. It includes everything – your digital papers, projects, pictures, software, music – the entire content in your hard drive will be deleted.
As a necessary precaution, it is imperative to properly back up all the important data. Use an external hard drive or cloud storage services to safekeep your precious data. Double-check to confirm all vital files are fully backed up, thus, preventing unwanted circumstances.
Power Supply
The reset process can consume a fair amount of time and laptop battery. It can be disastrous if your Lenovo laptop loses power midway during the operation. You must ensure the laptop is connected to a reliable power supply throughout the process.
Operating System Reinstallation
Upon successful completion of the wiping process, your Lenovo laptop will have no operating system. Therefore, you must undergo the process of reinstalling the operating system. Be prepared with a valid copy of the desired OS and its product key.
Software Reinstallation
Further, all the software applications that you use on your laptop will also be deleted. List all the applications you will need reinstalled after the reset process, and gather all necessary software files and its product keys upfront. This list could include office productivity suites, browsers, antivirus programs etc.
Note: Be fully prepared before initiating the reset process as it involves several stages and can be time-consuming. Be sure to follow step by step guide carefully when you are wiping your Lenovo laptop and restoring it to factory settings.
Safeguarding Your Information Prior to Performing a Full Reset on Your Lenovo Laptop
Before you start the total clean-up process of your Lenovo laptop, it’s essential to secure all your files and data. This process of safeguarding your information involves creating a backup, which is a copy of all your valuable data stored in a secure location, preferably an external storage device or cloud storage. Here are some steps to guide you through the backup creation process before the full reset of your Lenovo notebook.
Steps to Make a Secure Backup of Your Files
- Gather All Files: Start by identifying all the files and folders in your laptop that require backup. They could include work-related files, important documents, pictures, videos, music, emails and other personal data.
- Select a Backup Location: Choose a secure storage location for your backup data. It could be an external hard drive, USB, another computer or a cloud-based storage service like Google Drive or Dropbox.
- Copy and Store Files: After determining a storage location, copy and save all the selected files into the chosen backup location. Confirm once the transfer is completed.
- Verify Backup: Double-check the backup files to ensure that all the critical data was successfully backed up before proceeding with the wiping process.
Note: Using automated backup software can simplify this process.
The process of creating a backup not only preserves your important information but also gives you peace of mind in knowing that your important files are safe. Once the backup is safely stored, you can proceed with the restoration of your Lenovo laptop to its original factory settings with confidence.
Guidelines for Getting Your Lenovo Notebook Ready for the Clearing Process
Before you initiate the process of cleaning your Lenovo notebook to reinstate its factory settings, there are some necessary steps for you to follow. These steps ensure that important data is safeguarded and the process is accomplished smoothly and effectively.
Step 1: Back up Your Vital Data and Settings
It’s essential to understand that the process of clearing will erase all the content on your notebook, including your personal files, applications, and user configurations. Thus, before you start, make sure to back up any important files or data that you wish to keep. You may use an external storage device or cloud storage services for this step. Do remember to also note down or backup any crucial settings or user profiles as they will be removed too in this process.
Step 2: Ensure You Have the Necessary Recovery Tools
You will need certain recovery tools to restart your Lenovo notebook to its original settings. Most Lenovo notebooks come with OneKey Recovery software pre-installed that can be used for this purpose. Double-check to ensure this software is operational on your system before proceeding.
Step 3: Keep Your Laptop Power Source Ready
The resetting process can take some time, and falling short of battery can abruptly stop this process and potentially harm your system. Therefore, it’s crucial to ensure that your Lenovo laptop is connected to a dependable power source before you start the resetting process.
Step 4: Secure Your Windows Product Key
If you’re planning to reinstall your Windows operating system after the reset, ensure that you have your Windows Product Key ready. It’s typically located on a sticker on the bottom side of the laptop or within its documentation. Secure this key as you’ll need it for fresh installation of your Windows operating system.
Instructions for Launching the Erasure Procedure on a Lenovo Laptop
Clearing all data from a Lenovo laptop involves a sequence of steps, which when accurately followed will result in the restoration of your laptop to its original factory settings. The process can be intricate, but the sections below will walk you through it.
Initialization of the Erasure Procedure
Make sure your Lenovo laptop is sufficiently powered to avoid any interruptions during the process. Then, turn off your laptop entirely before initiating the process of completely erasing the data.
After powering off, turn the laptop on again, then press the ‘Novo Button’. This button is specifically designed by Lenovo and it is usually located near the power button or on the left side of your laptop. Keep pressing this button until your laptop shows the Novo Button Menu.
The Novo Button Menu is a list of specific options, from which you must select ‘System Recovery’.Note: Use the arrow keys to navigate this menu and the ‘Enter’ key to select.
- Select ‘System Recovery’
- In the subsequent window, select ‘Restore from initial backup’.
Lastly, in order to proceed with the cleansing process, click on ‘Start’, and this will set the process in motion.
Make sure to keep the laptop well powered during this process as any interruption can cause the process to fail and might corrupt your laptop’s operating system.
In the case of a successful cleansing process, your Lenovo laptop will reboot and present you with its original setup just like when you first purchased it.
Important: Remember to backup any important files before you initialize the erasure process as this process will completely erase all your data and it won’t be recoverable.
Comprehending the Factory Restoration of Lenovo Laptop
When you encounter serious problems with your Lenovo laptop, such as system errors or slow performance, returning the laptop to its original factory settings can be a viable solution. The process of resetting the Lenovo laptop to its out-of-the-box state is often referred to as a factory reset. It is essentially a way of erasing all data and settings from the laptop and starting afresh.
Significance of Lenovo Laptop Reset Process
Completing a factory reset on your Lenovo laptop can be useful for several reasons. The most common reason is to resolve various software problems that can slow down the laptop or cause system errors. By starting anew after a full factory reset, you can often improve the laptop’s performance or clear the errors causing problems. It’s also an effective way to delete all your personal data if you’re selling or donating the laptop.
However, it’s vital to understand that a reset process will completely wipe all of your data from the laptop. This includes files, settings, and installed programs. Therefore, it’s important to back up any essential data you don’t want to lose.
Fundamental steps of Resetting the Lenovo Laptop
While the exact process can vary slightly depending on your Lenovo laptop model, the basic steps typically include:
- Accessing the recovery system menu, typically done by pressing a certain key or combination of keys during startup. This brings up the Advanced startup screen.
- Choose the ‘Troubleshoot’ option, and then select ‘Reset this PC’.
- Finally, choose ‘Remove everything’ for a full factory reset. You might also be given the option to fully clean the drive, which makes it harder for others to recover your deleted files.
In conclusion, understanding the Lenovo laptop factory reset process can be a crucial part of both troubleshooting problems and protecting your personal data. Always remember to back up any essential data before completing a reset to avoid unnecessary data loss.
How to Begin the Restore Process for A Lenovo Laptop’s Factory Settings
Embarking on the journey to reset your Lenovo laptop to its original factory settings can be an easy task to accomplish. Here, let’s delve into a step-by-step guide to successfully complete the process.
Phase One: Preparing for the Factory Settings Reset
Before embarking on anything else, it’s essential to ensure all crucial data is backed up. A factory settings restore will wipe out everything – it’s a fresh new start. So, either use an external hardware device or cloud storage, depending on the size of your data. This action guarantees data protection and provides an easy way to retrieve it after the restoration process.
Starting the Lenovo Laptop Factory Reset
Now to initiate the process. On your Lenovo laptop, navigate to the Start menu, usually located at the lower-left corner of your screen. Once there, locate and select Settings. In the Settings menu, opt for Update & Security.
- The Update & Security page will open up, choose the Recovery option on the left menu.
- The recovery page presents you with two main headings, Reset this PC and Advanced startup. Under Reset this PC click the Get Started button to start the factory reset process.
- Two options will be provided – to Keep my files or Remove everything. To restore the factory settings, select Remove everything. Doing this will restore the Lenovo laptop to the day it was manufactured.
Be patient, as the process might extend over an hour, depending on the laptop’s functionalities and specifications. Upon completion, the Lenovo laptop will restart automatically. After rebooting, you can start the process of installing your preferred programs and restoring your backed up files.
Essentially, it’s a simple process that saves time and energy, allowing you to remedy issues that could have been problematic. Embrace this process as the first troubleshooting step whenever your Lenovo laptop faces significant operational challenges.
Useful Hints for a Smooth Lenovo Laptop Clearing and Factory Reset
Restoring your Lenovo laptop to its original factory settings can be a tricky process, but with a few helpful hints, you can achieve a successful system wiping and factory reset. Before starting the process, make sure you are ready for it and understand its potential impact.
Preparation Stage
Start by backing up all essential data. Wiping your laptop and restoring it to factory settings will remove everything on the drive. Ensure critical documents, pictures, and files are saved either on an external hard drive or cloud storage.
Guidelines for Factory Reset
Next, familiarize yourself with the process to avoid mishaps. Know where to find the factory reset tool in the Lenovo system setting. Here is a general guideline for conducting a factory reset on a Lenovo laptop:
- Turn on the laptop and go to the Start Menu.
- Select the ‘Update & Security’ option.
- Click on ‘Recovery’ and under ‘Reset this PC’, select ‘Get Started’.
- Choose the ‘Remove Everything’ option.
- Select ‘Just remove my files’ or ‘Remove files and clean the drive’, based on your preference.
- Finally, select ‘Reset’ to initiate the process.
Remember, the process may take several hours, depending on the size of your drive and the amount of data it contains.
Post-Reset Actions
After the factory reset is complete, ensure to update all device drivers. Some functionalities might not work correctly if outdated drivers are in use. Lenovo provides a utility tool named ‘Lenovo System Update’ which can be used to download and install the latest drivers automatically.
Following these steps and tips can ensure a successful laptop wipe and factory reset, notably for Lenovo computers. It will help your computer get a fresh start, improving its performance and potentially extending its lifespan.
Troubleshooting Common Issues Encountered When Cleaning a Lenovo Laptop
While performing a full reset on a Lenovo laptop may seem straightforward, several challenges could surface during the process. This guide offers possible solutions to help navigate the potential problems one might encounter during this operation.
Insufficient Power
One common issue that users face while erasing their Lenovo laptops is running out of battery during the process. This system reboot usually takes a significant amount of time. Therefore, plugging your laptop into a power source could guarantee enough battery life to prevent the system from shutting off midway through the process, hence ensuring a smooth and successful laptop wipe.
Data Backup
Another challenge is the loss of vital data. Users frequently initiate the factory reset without backing up crucial information. If your laptop crashes during the process, this could mean losing priceless data. Always ensure that you back up your important files on an external hard drive or cloud service before initiating the reset process.
Software Reinstallation Issues
Following the factory reset, users might face problems with software reinstallation. This especially concerns essential drivers and applications. Many of these programs come pre-installed on Lenovo laptops, but after performing factory settings restoration, they might disappear. Thus, having a clear plan for reinstalling your software, alongside drivers necessary for your hardware, is indispensable.
- Noting down the essential programs you need
- Keeping a copy of software serial numbers or activation codes
- Downloading driver software from the Lenovo website in advance
In conclusion, taking time to plan and prepare will help to avoid potential problems when resetting your Lenovo laptop. Remember to have a consistent power supply, back up essential data, and plan for software reinstallation afterwards to ensure a successful operation.
Re-establishing the Operating System on Your Lenovo Laptop Following the Wipe
Once you have wiped your Lenovo laptop, the subsequent step is setting up the operating system anew. This is essential to regaining the functionality of your laptop. Here is a comprehensive guide to assist you through the process.
Reinstalling Windows on Lenovo Laptop
Have you accomplished the hard reset on the Lenovo computer? The next phase is installing Windows. Start off by inserting your bootable USB flash drive or DVD into your machine. Upon starting your laptop, you should immediately see an onscreen instruction guiding you to press a certain key to access the boot menu. This key is usually F12, however it could differ based on your laptop’s model.
Steps to Follow:
- Turn on your Lenovo laptop and press the key sequence to access the boot menu.
- Select your bootable device (USB or DVD).
- The Windows setup should launch. Follow all the prompts.
- When requested, enter your Windows product key.
- You will be asked to designate an installation type. Choose the ‘Custom: Install Windows only’ option.
- Select where you want to install Windows. In most instances, the hard drive should be your go-to selection.
- Finish the setup process. Once done, your computer will restart and you have now installed Windows anew on your Lenovo laptop.
If you’re planning to restore your Lenovo laptop to its factory settings, ensure you’ve made a backup of all your data. This way, you won’t lose your files during the reinstallation process. Taking cautious measures such as backing up your data should always be your priority before you undergo a computer wipe.
Resetting your Lenovo laptop and reinstalling the operating system may seem arduous, but by following the outlined steps, youll be able to execute it with relative ease. The process is a good solution when youre facing persistent software-related problems or if you want to completely wipe away your personalized settings and start fresh.
Solving Problems with Your Lenovo Laptop Following a Full System Reset
After performing a complete system reset on your Lenovo laptop, you may encounter some issues. These can range from minor glitches to more significant problems. This guide will walk you through some common issues and how to resolve them.
Resolving Common Issues
Upon performing a system reset, your Lenovo laptop may exhibit some concerning behaviors. Not to worry, many of these can be handled through simple troubleshooting steps. Some common issues include:
- Slow Booting
- Failure to Connect to Wi-Fi
- Screen Display Problems
- Sound Issues
Slow Booting: If your laptop is slow to boot after a system reset, it could be due to several reasons. Try checking if your system is updating itself. Windows 10, for instance, can be slow to boot while it’s updating. If this isn’t the case, the issue could be due to the BIOS settings, which could have been changed during the reset.
Failure to Connect to Wi-Fi: Sometimes after a system reset, your laptop may fail to connect to Wi-Fi due to driver issues. Updating your Wi-Fi adapter’s driver can solve this problem. You can update the driver by going into the device manager, locating your adapter, and then clicking on the update driver button.
Screen Display Problems: In some cases, after a system reset, the laptop may have display issues. Try adjusting the screen resolution in settings. If that fails to solve the issue, updating, reinstalling, or rolling back the display driver may help.
Sound Issues: If you’re having trouble with your laptop’s sound after a system reset, checking the sound settings is a good place to start. Ensure that the sound is not muted or set too low. If there are still issues, the problem may be with the sound driver. Try updating the driver from the device manager.
By following these troubleshooting steps, you should be able to resolve common issues encountered after a full system reset on your Lenovo laptop. If issues persist, it may be best to contact Lenovo’s support for more specialized assistance.
FAQ How to wipe a lenovo laptop:
Why won’t my Lenovo laptop boot up after a factory reset?
Post factory reset, if your Lenovo laptop is not booting up, it’s possible that the boot order is incorrectly set in BIOS. Access the BIOS setup during the system startup, select the right boot drive (hard disk where the OS is installed) and verify or modify the boot sequence.
Why doesn’t my Lenovo laptop recognize USB devices after a factory restore?
After a factory restore, your Lenovo laptop may lack necessary drivers to recognize certain devices. You should visit the Lenovo support website and download and install the appropriate drivers for your specific laptop model.
Why isn’t my Lenovo laptop’s camera functioning after restoring factory settings?
If your laptop’s camera isn’t working after a factory reset, you may need to update the camera’s driver. Go to Lenovo’s official website to download the most recent camera driver for your laptop model and install it.
How to troubleshoot Wi-Fi issues on my Lenovo laptop post factory settings restore?
Post factory settings restore, Wi-Fi issues can often be related to drivers. Visit Lenovo’s official website, find the latest Wi-Fi driver for your specific laptop model and install it. If the issue continues, check your Wi-Fi router and Internet connection for potential problems.
Why is my Lenovo laptop running slow after a factory restore?
If your Lenovo laptop is running slow after a factory restore, it’s possible that there are too many startup programs or your system requires an update. Use Task Manager to disable unnecessary startup programs and update your laptop via Windows Update.
What should I do if the sound is not working on my Lenovo laptop after factory settings restore?
If your Lenovo laptop’s sound is not working post factory settings restore, you may need to update your audio drivers. To do this, visit Lenovo’s official website, locate the latest audio drivers for your specific laptop model, download and install it.
Most Popular Articles

Realme Book RMNB 1002 ultrabook review with 14-inch 3:2 screen

Amazon Fire Tv Omni Series 4k 75-inch Alexa Omni Qled Series 4k Uhd Smart Amazon Fire Tv Omni Qled

Review and testing of the Gigabyte Aorus 15P XD laptop based on the Intel Core i7-11800H processor and the Nvidia GeForce RTX 3070 graphics card

Lenovo Legion 5 Pro Review: Heavyweight Gaming
NVIDIA GeForce GTX 570 Card Specs and Review | NVIDIA GeForce Forums

Best Laptop Under 300 in 2024 Cheap Laptop